GitHub Sync
This guide describes how to integrate with GitHub.com. If you use self-hosted GitHub Enterprise Server, see GitHub Enterprise Server Sync.
You can integrate Swagger Studio with GitHub.com. This allows you to synchronize your API definition, auto-generated server code, or client SDK with an existing GitHub repository. You can fully control which files will be added, updated, or ignored in the target repository.
Considerations
GitHub Sync supports OpenAPI 2.0, 3.0, 3.1, and AsyncAPI 2.x, 3.0.
The target repository must not be empty. It must contain, for example, a README or .gitignore file.
The GitHub Sync configuration is bound to a specific version of the API, so you can synchronize the code for different versions separately.
Optionally, you can configure SSH commit signing. With this setting enabled, GitHub Sync sends new commits with a signature, and they appear as Verified in GitHub's commit history. See SSH signed commits below.
Configure GitHub Sync
Open the API page in Swagger Studio.
If the API has several versions, select the version whose code you want to store on GitHub.
Click the API name, switch to the Integrations tab, and click Add New Integrations:
Select GitHub Sync.
In the subsequent dialog, specify the integration parameters:
Name – Required. A display name for the integration.
GitHub Token – Required. The GitHub access token that Swagger Studio will use to access the target GitHub repository.
The easiest way to get the token is to click Connect to GitHub and authorize Swagger Studio to retrieve information from your GitHub account.
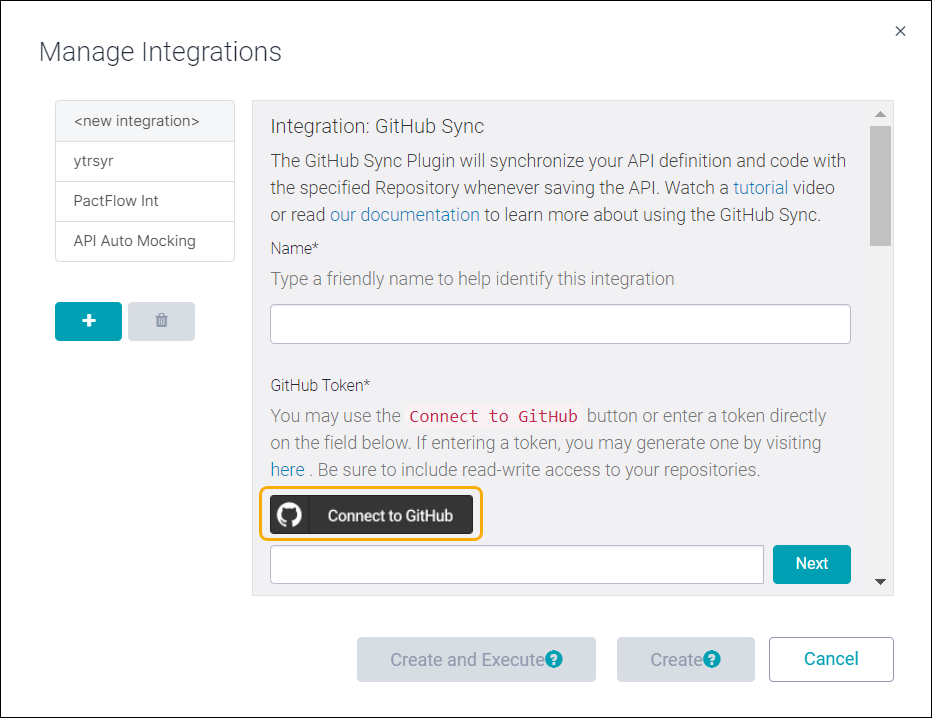
You can also create a token on the GitHub web site yourself: https://github.com/settings/tokens. For detailed instructions, see Creating an access token for command-line use in GitHub documentation.
Important
The access token must have the public_repo scope if the target GitHub repository is public, or the repo scope if it is private.
Click Next in the GitHub Token edit box to continue. Swagger Studio will validate the token and then display other parameters.
Repository Owner – Select the GitHub user or organization that owns the desired repository. The list displays only those accounts your GitHub token has access to.
Repository – Select the repository to push the code to. This repository must not be empty. It must contain at least one commit, for example, a README or .gitignore file.
Sync Method – Select the synchronization type:
Sync method
Description
Basic Sync
Swagger Studio will manage all files in the specified branch and folder: new files will be added, existing files will be overwritten, and unused files will be deleted.
Advanced Sync
Similar to Basic Sync, but you can specify which files will be overwritten or ignored. Use this method if the output folder contains existing files that you want to keep.
Branch – Required. The repository branch to push the code to. If this branch does not exist, it will be created based on the repository’s default branch.
Generated API Code – Required. Select what you want to generate: server code, client SDK, API documentation, or the OpenAPI definition itself as YAML or JSON. See here for a list of supported languages and frameworks.
Tip
To customize code generation options, such as package names, use the Export > Codegen Options menu in the Swagger Studio editor. See Code Generation Options for details.
Output Folder – The output folder for the generated code, relative to the repository root. For example, server or sdk/android. If this folder does not exist, it will be created. If the output folder is not specified, Swagger Studio will create files and folders in the repository root.
Important
Use forward slashes (
/) as path separators:folder/subfolder1/subfolder2 – Correct
folder\subfolder1\subfolder2 – Incorrect
Paths – Available only if you selected Advanced Sync. Use these options to control which files and folders will be created, updated, deleted, or ignored during synchronization. All the paths are relative to the Output Folder. You need to specify either Partially Managed Paths or Fully Managed Paths.
Partially Managed Paths – These files and folders will be created if they do not exist, but the existing files and folders will not be modified. The wildcard
*indicates all files and folders in the Output Folder.Fully Managed Paths – These files and folders will be completely managed by the integration: new files will be added, the existing files will be overwritten, and the files that are no longer used will be deleted. You can use
*as a wildcard for all files.Ignored Paths – These files and folders will remain as is and will not be changed in any way.
Important
Use forward slashes (
/) as path separators, for example, sdk/android/README.md.Output file – Only used if Generated API Code is JSON or YAML, that is, the OpenAPI definition itself. Specifies the name of the .json or .yaml file to create, for example, swagger.yaml or petstore.json. This file will be created in the Output Folder.
SSH Signed Commits – Optional. Select the Sign commits with SSH checkbox to enable cryptographic signing for all commits pushed by this integration.
Important
In Swagger Studio On-prem installations, an administrator must first configure a bot account to enable this option for users. For detailed configuration guidance, see Swagger Studio On-premise below.
In Swagger Studio SaaS, no additional configuration is required.
Enabled – Select or clear this check box to enable or disable the integration.
Click Create, then Done.
SSH signed commits
When SSH commit signing is enabled, every commit pushed to GitHub via this integration is cryptographically signed and displays a Verified badge in GitHub's commit history.
Swagger Studio SaaS
Signing is handled entirely by SmartBear. When you enable this option, commits are co-authored and signed by the Swagger Studio Bot - a dedicated GitHub account with an SSH signing key pre-configured for each environment. You do not need to provide any keys or credentials.
Swagger Studio On-premise
Note
SSH commit signing for On-premise installations is available from Swagger Studio version 2.15.
On-premise installations require a dedicated GitHub bot account, set up and maintained by your administrator. The bot account must have an SSH signing key added in its GitHub account settings so that GitHub can mark the resulting commits as verified. Without this key, commits are still signed but appear without the Verified label.
Configuration is performed at the installation level, either through the KOTS Admin Panel (for KOTS-managed installations) or the Helm values file (for Helm-managed installations), as detailed below.
Important
Before users can enable signed commits, a bot account must be fully configured in your Swagger Studio instance with an email address, username, and SSH key. If this configuration is incomplete, an error notification is displayed for users attempting to enable the feature.
Administrator configuration: KOTS Admin Panel
Open the KOTS Admin Panel for your Swagger Studio installation.
Navigate to Integration Settings.
Under the Enable signed commits section, fill in the following fields:
Enable signed commits - Toggle to activate the signed commits feature.
Committer email - Required. Email address of the GitHub bot account for commit signing.
Committer username - Required. Username of the GitHub bot account for commit signing.
Private SSH key - Required. The private SSH key used to sign commits. This value is stored securely.
Save the settings.
Users can now enable signed commits in the GitHub Sync integration UI.
Administrator configuration: Helm installation
Add the following values to your
values.yamlfile, replacing the sample key names with the corresponding keys defined in your Helm chart:signedCommits: enabled: true committerEmail: "bot@example.com" # Email of the GitHub bot account committerUsername: "swagger-studio-bot" # Username of the GitHub bot account sshPrivateKey: | # Private SSH key -----BEGIN OPENSSH PRIVATE KEY----- ... -----END OPENSSH PRIVATE KEY-----Apply the updated configuration:
helm upgrade <release-name> <chart> -f values.yaml
Users can now enable signed commits in the GitHub Sync integration UI.
Push to GitHub
When you are ready to push your changes, click Sync on the editor toolbar, enter a commit message and click Push. Swagger Studio will generate the specified target (server code, client code, API documentation, or an OpenAPI JSON or YAML file) and push it to the configured repository and branch.
Commits are made on behalf of the user associated with the access token. If synchronization fails (for example, due to a permission problem), you will see an integration error at the top of the Swagger Studio Editor.
Generate multiple targets
You can add multiple GitHub Sync integrations for different targets. For example, one for the Node.js server, and another for the Android client SDK. You can push all the targets to the same repository, but be sure to use different Output Folders to avoid conflicts.
Disable GitHub Sync
If you no longer want to sync with GitHub, you can disable or delete the GitHub Sync integration. The existing files will remain in your GitHub repository, but Swagger Studio will not update them anymore.
Troubleshooting
If the integration fails with an error, check the access token expiration date. If it is about to expire, generate a new token and update the token in the integration settings. If the token has expired, generate a new one and create the integration anew.